How to Temper Chocolate: 3 Reliable Methods, Exact Temps
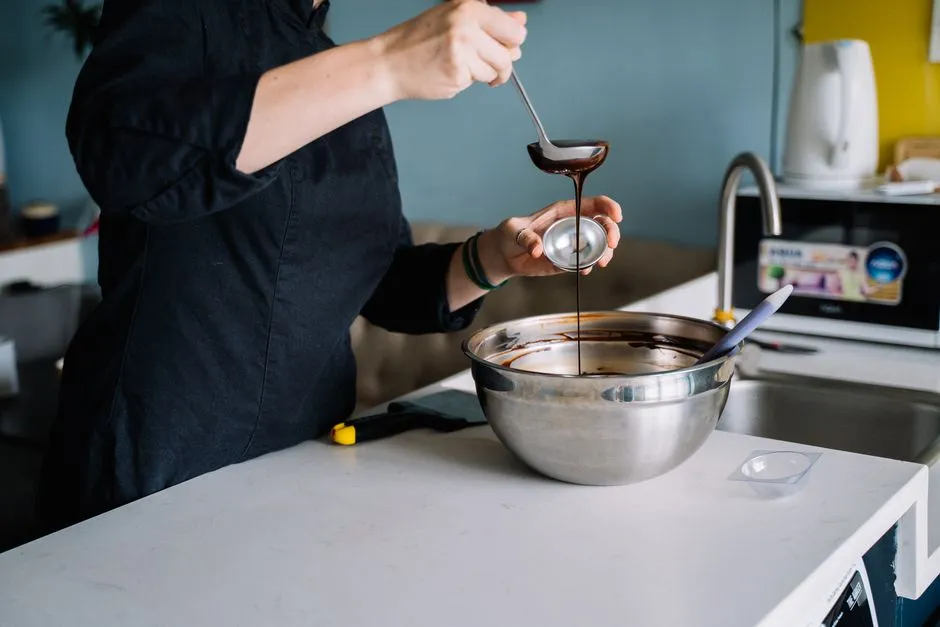
- How to Temper Chocolate: 3 Reliable Methods and Exact Temperatures
- Tempering Temperature Chart
- Method 1: Seeding (Most Reliable at Home)
- Method 2: Microwave (Partial-Melt Shortcut)
- Method 3: Tabling (The Classic, for Larger Batches)
- The 5-Minute Temper Test
- Why Isn't My Chocolate Shiny? Troubleshooting Guide
- Holding and Storing Tempered Chocolate
How to Temper Chocolate: 3 Reliable Methods and Exact Temperatures
To temper chocolate, you melt it fully, cool it to the point where stable cocoa butter crystals form, then rewarm it slightly to a precise working temperature. For dark chocolate, that means melting to 115–120°F (46–49°C), cooling to about 82°F (28°C), and working at 88–90°F (31–32°C). Hold those numbers and the chocolate sets glossy, snaps cleanly, and releases from molds. Miss them and it sets dull, streaky, or soft.
That's the whole game. Everything below — the three methods, the chart, the troubleshooting — is just different ways of hitting those temperatures reliably in a home kitchen. You need a digital thermometer, a dry bowl, and about 20 minutes. You do not need a marble slab, though we'll cover that method too.
What tempering actually does
Cocoa butter is polymorphic: it can solidify into several different crystal structures, and only one of them — usually called Form V, or beta crystals — gives chocolate its snap, shine, and resistance to melting in your fingers. Beta crystals melt at roughly 93–94°F (34°C), higher than the unstable forms.
Tempering is simply crystal management. You melt the chocolate hot enough to erase every existing crystal, then encourage only beta crystals to form, then hold the chocolate at a temperature warm enough to melt out the unstable crystals but cool enough that the beta crystals survive. When the chocolate sets, those beta crystals act as a template and the whole mass solidifies in the stable form.
One important scope note: you only need to temper chocolate that will set on its own and be seen or snapped — dipped truffles, bark, molded bonbons, decorations. Chocolate that gets melted into a batter or emulsified with cream doesn't need it. A lava cake and a ganache both destroy the crystal structure anyway, so save yourself the effort there.
Tempering Temperature Chart
These are the standard working ranges. Milk and white chocolate contain milk solids, which is why every stage runs lower than dark.
| Stage | Dark chocolate | Milk chocolate | White chocolate |
|---|---|---|---|
| Melt to | 115–120°F (46–49°C) | 110–115°F (43–46°C) | 105–110°F (41–43°C) |
| Cool to | 81–82°F (27–28°C) | 80–81°F (27°C) | 79–80°F (26–27°C) |
| Work at | 88–90°F (31–32°C) | 86–88°F (30–31°C) | 82–84°F (28–29°C) |
The chart gives you two different ceilings, and both are named throughout this guide. The melt ceiling is the top of the "melt to" row — 120°F for dark, 115°F for milk, 110°F for white. The working ceiling is the top of the "work at" row — 90°F for dark, 88°F for milk, 84°F for white. Crossing the working ceiling costs you the temper, which is fixable. Crossing the melt ceiling damages the chocolate itself, which is not.
Three rules that apply to every method:
- Never exceed the melt ceiling. Overheated chocolate (especially milk and white) scorches and turns grainy, and there's no recovering it.
- Keep water away. A single drop can seize the whole batch into a dull paste. Dry bowls, dry spatulas, no wet steam.
- Use real chocolate. Tempering only works on chocolate whose fat is cocoa butter. Many baking chips are formulated to hold their shape in the oven: they carry stabilizers and less cocoa butter, and some substitute vegetable fats outright — those will melt, but they won't temper properly. Bars or couverture callets labeled with a cacao percentage are what you want, and that percentage tells you roughly how much cocoa solids plus cocoa butter you're getting. Our guide to Dutch process vs natural cocoa covers how the rest of the chocolate aisle's labels work, including what a cocoa powder's processing does and doesn't tell you.
Method 1: Seeding (Most Reliable at Home)
Seeding uses already-tempered chocolate — which is what any good bar or callet is, straight from the package — as a ready-made supply of beta crystals. It's the method we recommend for almost everyone.
You'll need: at least 1 lb (450 g) of chocolate (small batches lose heat too fast to control), a digital thermometer, a heatproof bowl, and a saucepan for a bain-marie or a microwave.
- Chop everything, reserve 25–30%. Chop the chocolate finely. Set aside about 25–30% of it — these are your "seeds."
- Melt the larger portion. Melt the remaining 70–75% over barely simmering water (bowl not touching the water) or in the microwave in short bursts, stirring often, until it reaches the melt temperature for your chocolate type: 115–120°F (46–49°C) for dark.
- Remove from heat and add the seeds. Stir in the reserved chocolate a handful at a time. The seeds cool the batch and, more importantly, dissolve partially and distribute intact beta crystals throughout.
- Stir down to working temperature. Keep stirring until the chocolate reads 88–90°F (31–32°C) for dark, 86–88°F (30–31°C) for milk, or 82–84°F (28–29°C) for white. If a few small seed pieces remain unmelted at that point, fish them out — don't warm the batch to melt them.
- Test, then work. Do the temper test below, then dip, mold, or spread while holding the chocolate in its working range.
If the chocolate cools to working temperature while lumps of seed remain, your seeds were too large or too plentiful — remove the lumps and carry on. If all the seed melts and you're still above working temperature, add more seed chocolate.
Method 2: Microwave (Partial-Melt Shortcut)
This is the fastest way to temper chocolate at home, and it works on a simple principle: if you never fully melt the chocolate, you never destroy all of its existing beta crystals — so you never have to rebuild them. The trade-off is a narrower margin for error, because one burst too many erases your crystal seed.
- Start with tempered chocolate. Chopped bars or callets that are glossy with a clean snap. (Bloomed or previously melted chocolate won't work here — use the seeding method instead.)
- Microwave at reduced power in short bursts. Use 50% power. Heat for 20–30 seconds, stir thoroughly, and repeat. Stirring matters more than heating — microwaves create hot spots, and stirring redistributes the heat.
- Stop while some chocolate is still unmelted. When roughly 80–90% is fluid with small softened pieces remaining, stop microwaving and stir steadily. Residual heat will melt most of the rest.
- Check the temperature. The chocolate should never exceed its working temperature — 88–90°F (31–32°C) for dark. If it stays at or below that ceiling, the surviving beta crystals keep it in temper. If it creeps above, you've melted out the seed and need to start over with the full seeding method.
This is the method to reach for when you need a cup or two of tempered chocolate for dipping and don't want a production. It scales down better than seeding, too — it's workable with as little as 8 oz (225 g).
Method 3: Tabling (The Classic, for Larger Batches)
Tabling is the traditional pastry-kitchen method: pouring melted chocolate onto a cool stone surface and agitating it to force crystal formation. It's fast at scale and satisfying to do, but it's the messiest option and the easiest to get wrong without practice.
- Melt fully to the melt temperature for your chocolate type, as in the chart above.
- Pour two-thirds onto a clean, dry marble or granite slab. Keep the remaining third warm in the bowl. This two-thirds/one-third split is specific to tabling — it is not the same as the 25–30% seed you reserve in Method 1, because here the reserved portion is warm chocolate used to bring the temperature back up, not solid seed used to bring it down.
- Spread and gather. Using a bench scraper and an offset spatula, spread the chocolate thin, then scrape it back to the center. Repeat continuously. The chocolate cools quickly and the constant agitation triggers dense crystal formation.
- Watch for thickening. When the chocolate visibly thickens and reads about 81–82°F (27–28°C) for dark, it's heavily seeded with crystals — including some unstable ones.
- Return it to the warm bowl and stir. The reserved warm chocolate brings the whole batch up to working temperature, melting out the unstable crystals and leaving the stable ones. Confirm 88–90°F (31–32°C) for dark before using.
If the batch ends up too cool and thick, warm it very briefly (seconds, not minutes) over the bain-marie, stirring constantly, and recheck. If it overshoots the working ceiling, you've lost the temper and must start the process again — the chocolate itself is fine, just re-melt within its melt range and temper again.
Slab temperature and why your kitchen matters
Tabling depends on the slab pulling heat out of the chocolate at the right rate, and that rate is set by the slab's own temperature. Aim for cool room temperature, roughly 65–70°F (18–21°C) — a few degrees below the chocolate's cool-to target, not chilled. Check it with the same probe you're using for the chocolate: stone holds whatever temperature the room has held it at for hours, so a slab in a warm kitchen is a warm slab no matter how cold it feels to the hand. Too warm and you'll scrape for ten minutes without reaching 82°F. Straight from the freezer is worse — it drives the surface past its target while the bulk is still warm, setting a skin of unevenly crystallized chocolate on the stone and inviting condensation, which is how a batch seizes.
Ambient kitchen temperature is the most common reason home tempering drifts, in any of the three methods. At 65–70°F (18–21°C) a tempered bowl loses heat slowly and predictably and finished pieces set in minutes. Above about 75°F (24°C) the bowl creeps toward the working ceiling on its own, the temper dissolves while you dip, and pieces stay tacky. Below about 60°F (16°C) the chocolate thickens faster than you can work it and over-crystallizes into sludge. If your kitchen runs warm, work in smaller batches so each is finished before it drifts, and keep the bowl away from any surface near the oven.
The 5-Minute Temper Test
Never commit a batch to molds without testing. Dip the tip of a butter knife or a strip of parchment into the chocolate and set it down at cool room temperature, around 65–70°F (18–21°C).
- In temper: it begins setting within about 3–5 minutes, dries to an even satin gloss, and shows no streaks.
- Out of temper: it stays wet and tacky well past 5 minutes, or sets blotchy, streaky, or gray.
If the test fails, don't panic and don't throw anything out. Re-melt the batch up to — but never past — the melt range in the chart: 115–120°F (46–49°C) for dark, 110–115°F (43–46°C) for milk, 105–110°F (41–43°C) for white. That is hot enough to erase every crystal, including the bad ones, and it means deliberately going back above the working ceiling while staying under the melt ceiling. Then run the method again from the start. Chocolate can be re-tempered many times; only water contamination or scorching from overheating actually ruins it.
Why Isn't My Chocolate Shiny? Troubleshooting Guide
Dull, streaked, or soft results almost always trace to one of five causes:
- Fat bloom (gray-white streaks or swirls). The chocolate set with unstable crystals — it was never in temper, or it warmed above the working ceiling after you tested. Re-melt within the melt range and re-temper; bloomed chocolate is safe and fully recoverable.
- Sugar bloom (rough, speckled surface). Moisture hit the surface, dissolved sugar, and left crystals behind when it evaporated. Common when chocolate goes from a cold fridge into humid air. Prevent it by refrigerating briefly (10–20 minutes to set molded pieces) rather than storing chocolate cold long-term.
- No snap, melts on contact. Set in an unstable crystal form, or it isn't real cocoa-butter chocolate (see the note on chips above).
- Thick, sludgy working texture. Over-crystallized: too much seed, held too long at the bottom of the working range, or a kitchen running cold. Warm it a degree or two, very gently, with constant stirring.
- Grainy, stiff, matte paste. Seized by water or scorched by heat. Seized chocolate can't be tempered, but it's not garbage — whisk in warm cream and you've made the base of a ganache; our ganache ratio guide tells you how much cream per weight of chocolate.
Holding and Storing Tempered Chocolate
While you work, keep the bowl in its working range: set it on a heating pad on low, return it briefly over warm (not simmering) water, or give it a few seconds of half-power microwave, always stirring after. Every reheat should be measured — the working ceiling is a hard limit while you're working, and the melt ceiling is a hard limit always.
Finished pieces set best at cool room temperature. Once fully set, store them airtight at 60–68°F (16–20°C), away from light and strong odors. Properly tempered dark chocolate holds its snap and shine for a year or more at those conditions. Milk and white are best within a few months — white sooner than milk, since white chocolate is mostly cocoa butter, milk solids, and sugar with no cocoa solids to slow the fats going stale. Avoid the refrigerator for storage — condensation on retrieval is exactly how sugar bloom starts.
Tempering rewards precision more than talent. Pick the seeding method, trust the thermometer over your eyes, and test before you pour. After two or three batches, the numbers in the chart stop being something you look up and start being something you know.