How to Melt Chocolate Without Burning or Seizing
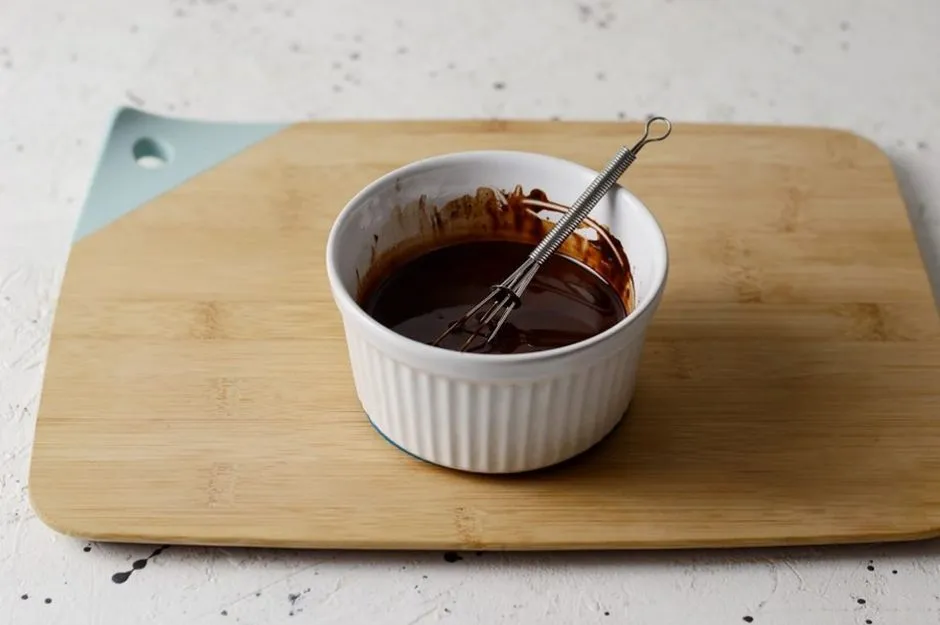
Melt slowly, stir often, and keep every drop of water out
To melt chocolate in a microwave, chop it evenly and heat at half power in short bursts, stirring thoroughly after each one. Stop when a few soft pieces remain; the bowl's residual heat will finish them. For a double boiler, set a dry heatproof bowl over barely simmering water without letting the bowl touch the water, and stir until almost smooth before removing it.
Dark chocolate tolerates more heat than milk or white, but none benefits from rushing. For ordinary melting, keep dark chocolate below about 120°F (49°C), milk below 115°F (46°C), and white below 110°F (43°C). If the chocolate will be tempered, follow the full temperature curve in our tempering guide rather than merely melting it.
Choose chocolate that suits the job
Bars and couverture-style wafers melt more fluidly than many baking chips because chips are formulated to retain shape in the oven. Chips can still melt into cookie batter or a rustic topping, but a smooth coating or thin drizzle is easier with chopped bar chocolate.
Chocolate-flavored coatings made with non-cocoa vegetable fats follow their own package directions. They may set without tempering, but they do not behave like cocoa-butter chocolate. Read the ingredient list before troubleshooting the wrong material.
Chop bars into pieces no larger than a small bean, with minimal size variation. Large chunks remain solid while fine crumbs overheat. Use a completely dry bowl, spatula, knife, and cutting board.
Microwave method
The microwave is fastest and produces no steam near the bowl.
- Put evenly chopped chocolate in a dry microwave-safe bowl.
- Heat at 50% power for 20 seconds.
- Stir from the center and scrape the sides, even if the pieces still look solid.
- Repeat in 15- to 20-second bursts, stirring every time.
- When most pieces are fluid, shorten to 5- to 10-second bursts.
- Stop with a few soft lumps remaining and stir until smooth.
Microwaves create hot spots, so the stir is part of the heating method. A bowl can contain scorched chocolate beside pieces that still hold their shape. White chocolate needs especially short final bursts because its milk solids and sugar can overheat before the bowl looks fully melted.
Do not judge by total time from another kitchen. Batch weight, bowl material, microwave power, starting temperature, and piece size all change it. Temperature and texture outrank the clock.
Double-boiler method
Add 1 to 2 inches (2.5 to 5 cm) of water to a saucepan and bring it to a bare simmer. Set a heatproof bowl over the pan so its bottom does not touch the water. Steam should stay below the bowl, not blast around its sides.
Add chopped chocolate and stir continuously or very frequently. When only small lumps remain, lift the bowl away and set it on a dry towel. Wipe condensation from the outside before pouring. Stir until residual heat finishes the melt.
Never cover the warm bowl; trapped condensation can drip into the chocolate. Do not let the water boil hard, and do not lift the bowl where steam will roll directly into it. The method is gentle only when the water is gentle.
Why chocolate seizes
Chocolate is a suspension of dry cocoa and sugar particles in fat. A small amount of water wets those particles unevenly and makes them clump into a thick, grainy paste. Common sources include a damp spatula, steam, a wet bowl, water-based flavoring, or condensation on cold chocolate.
Seized chocolate is different from overheated chocolate. Seized chocolate turns abruptly thick after moisture contact. Overheated chocolate may become dull, thick, scorched-smelling, or grainy after excessive heat. Burnt flavor cannot be repaired.
Oil-based flavoring can be compatible when designed for chocolate. Ordinary extracts are often water- or alcohol-based and can trigger clumping. Follow the product's directions and add only after checking compatibility.
Can seized chocolate be fixed?
You cannot restore seized chocolate to a dry coating by adding more water. You can often repurpose it into a smooth sauce or ganache by deliberately adding enough warm liquid to create an emulsion.
Add warm cream or water 1 teaspoon at a time, stirring firmly until the paste loosens. Once liquid enters, commit to a sauce, batter, or ganache use. Our ganache ratio guide provides weighed chocolate-to-cream ratios for a predictable set.
Do not add a spoonful of cold butter and expect it to absorb water. Extra cocoa butter or neutral fat can thin merely over-thick chocolate, but it will not reliably undo the particle clumping caused by moisture.
When melting and tempering are different
Melting only makes chocolate fluid. Tempering manages cocoa-butter crystals so a coating sets glossy, firm, and snappy at room temperature. Chocolate stirred into brownies, cake batter, custard, or cream does not need tempering because the recipe disrupts the crystal network.
Temper chocolate for molded pieces, bark, decorations, or dipped centers meant to set as exposed chocolate. Simply melt it for batters, sauces, and ganache. If an untempered coating sets streaky or soft, the failure is not the melting method; it is the missing crystal-control step.
Add-ins without breaking the texture
Warm cream, butter, or another recipe liquid before combining it with melted chocolate. A large temperature difference can thicken or split the mixture. Add liquid gradually while stirring from the center outward.
For chocolate and butter used in baking, melt them together only if the recipe directs. Butter contains some water, but in a planned mixture there is enough dispersed liquid and fat to form the intended emulsion. Random droplets are the problem, not every ingredient containing water.
Salt, dry spices, and finely ground espresso powder can be stirred in after melting. Liqueurs, fruit purees, and extracts need a recipe designed around their water and alcohol content.
Troubleshooting
| Problem | Likely cause | Best response |
|---|---|---|
| Thick, grainy paste appeared suddenly | Water or steam | Convert to sauce or ganache with measured warm liquid |
| Dull, stiff, burnt-smelling chocolate | Overheated | Discard if scorched; use lower heat next time |
| Small lumps remain | Pieces too large or insufficient stirring | Remove from heat and stir; rewarm only briefly |
| Chocolate is smooth but too thick for dipping | Chip formulation or low cocoa-butter fluidity | Use bar/couverture next time; thin only if recipe permits |
| Coating sets streaky or soft | Chocolate was melted but not tempered | Re-melt within safe range and temper |
| White chocolate turns sandy | Excess heat or moisture | Use shorter bursts and fully dry tools |
Holding melted chocolate
Work as soon as it is smooth. If it thickens from cooling, rewarm in a 5-second microwave burst or briefly over warm water, then stir and measure. Do not leave the bowl sitting over heat; the center can climb while the surface appears unchanged.
Keep the bowl away from sink splashes and oven steam. For a long dipping session, temper the chocolate and hold it in its narrow working range rather than repeatedly melting and cooling it.
The reliable method is intentionally boring: uniform pieces, dry tools, moderate heat, constant stirring, and an early stop. Those habits prevent both chocolate failures—water-driven seizing and heat-driven scorching—and they work whether you melt 4 ounces (113 g) for a batter or a larger bowl for the chocolate techniques collection.