Fudgy Brownies: Crackly Tops, Dense Centers
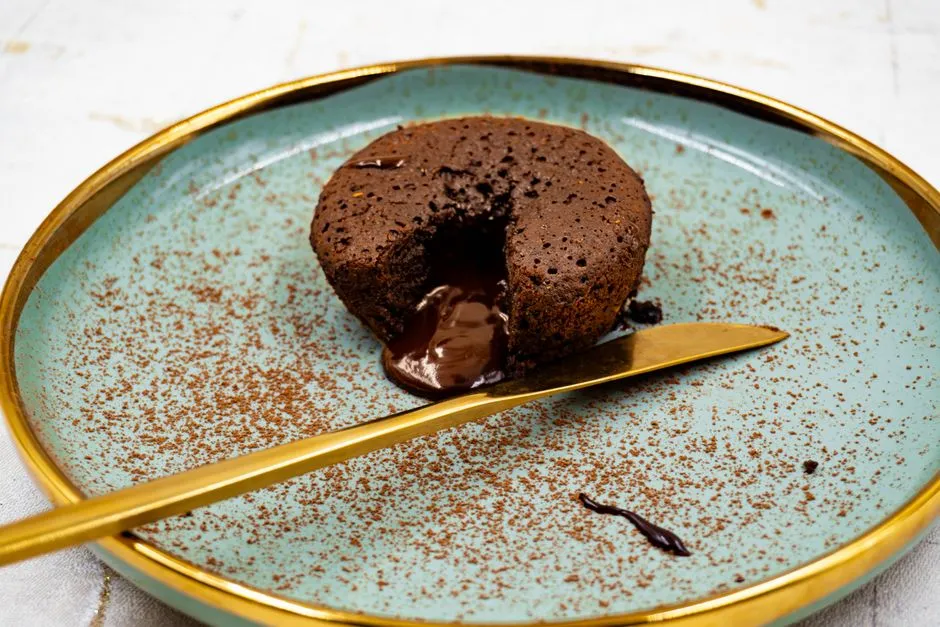
Melted chocolate, low flour, and one extra yolk make them fudgy
These brownies use 6 ounces (170 g) dark chocolate, 1/2 cup (113 g) butter, 1 1/4 cups (250 g) sugar, 2 eggs plus 1 yolk, 2/3 cup (85 g) flour, and 1/4 cup (25 g) cocoa. Bake in an 8-inch (20 cm) square metal pan at 325°F (165°C) for 27 to 34 minutes. The edges should be set and the center should yield moist crumbs, not liquid batter, on a toothpick.
The melted chocolate supplies density and cocoa butter; the extra yolk adds fat without another white's structure; restrained flour limits cakiness. The crackly top comes from dissolving sugar well into warm eggs and chocolate, not from adding more leavener. There is no baking powder here.
Fudgy brownie recipe
Makes: 16 brownies
Pan: 8-inch (20 cm) square metal pan
Oven: 325°F (165°C)
Prep: 20 minutes
Bake: 27 to 34 minutes
Cool: at least 90 minutes
Ingredients
- 6 ounces dark chocolate, 55% to 70%, chopped (170 g)
- 1/2 cup unsalted butter (113 g)
- 1 1/4 cups granulated sugar (250 g)
- 2 large eggs, room temperature
- 1 large egg yolk, room temperature
- 2 teaspoons vanilla extract (10 ml)
- 2/3 cup all-purpose flour, spooned and leveled (85 g)
- 1/4 cup natural or Dutch-process cocoa powder (25 g)
- 1/2 teaspoon fine salt (3 g)
- 1/2 cup chopped toasted nuts or chocolate pieces (85 g), optional
Natural and Dutch-process cocoa both work because the recipe has no chemical leavener depending on cocoa acidity. Dutch-process usually tastes darker and mellower; natural often tastes sharper. The cocoa comparison explains the chemistry in recipes where leavening does matter.
Method
- Prepare the pan. Heat the oven to 325°F (165°C). Lightly grease the pan and line it with two crossed strips of parchment, leaving handles for lifting.
- Melt chocolate and butter. Combine them in a dry heatproof bowl. Microwave at half power in short bursts, stirring each time, or use a bowl above barely simmering water. Stop when a few pieces remain and stir smooth.
- Whisk sugar into the warm mixture. Let the chocolate cool for 2 minutes, then whisk in the sugar for about 45 seconds. It will look grainy; the goal is even distribution, not full dissolution.
- Add eggs and yolk. Whisk in eggs one at a time, then the yolk and vanilla. Continue for 60 to 90 seconds until the batter looks glossy and slightly thickened. Warmth plus thorough whisking helps sugar form the thin top crust.
- Combine dry ingredients. Whisk flour, cocoa, and salt in a separate bowl, breaking all cocoa lumps.
- Fold. Add dry ingredients to chocolate and fold with a spatula just until no dry pockets remain. Fold in optional nuts or chocolate with the final strokes. Do not beat after flour enters.
- Bake. Spread evenly in the pan. Bake 27 to 34 minutes, rotating once after 22 minutes only if your oven browns unevenly.
- Check. The edges should be firm, the surface shiny and cracked, and the center no longer ripple when nudged. A toothpick 1 inch from center should show moist dense crumbs, not raw streaks.
- Cool fully. Set the pan on a rack for at least 90 minutes. Lift out and cut with a sharp knife wiped between slices.
Do not taste raw batter. Flour and eggs are raw foods, and baking—not the appearance or smell of batter—is the safety step.
Why the crackly top forms
The papery crust is a thin sugar-and-egg film that rises to the surface. Warm melted fat, fine granulated sugar, and vigorous mixing before flour help build it. Coarse sugar that remains poorly incorporated can produce a duller top.
The crust is not the measure of doneness. It can form while the center is still raw, so use edge set, center movement, and the toothpick together. Chocolate pieces can smear the toothpick; test a second spot if you hit one.
How to tell fudgy from underbaked
Fudgy brownies are dense after cooling but hold a clean slice. Underbaked brownies leave shiny liquid batter on the tester and can sink into paste. Because the center continues setting as it cools, a few moist crumbs are correct; a completely dry toothpick usually means a more cake-like result.
Glass pans heat differently and hold heat longer. This timing is written for light-colored metal. If using glass, follow its manufacturer guidance, avoid sudden temperature changes, and expect the edges and center to behave differently. Do not raise the oven temperature to hurry the middle.
Why the pan size matters
An 8-inch square pan has 64 square inches of surface area. A 9-inch square has 81 square inches—about 27% more—so the same batter spreads much thinner and reaches its doneness cues sooner. A smaller pan makes a deeper center that needs more time while the edges keep baking.
That is why pan substitutions cannot be handled by adding or subtracting a fixed number of minutes. Use the specified 8-inch metal pan for the stated range. If you change the pan, begin checking early and trust the set edges, stable center, and moist-crumb test rather than the clock alone.
Ingredient choices that change texture
- Higher cacao chocolate: usually brings more cocoa solids and less sugar, producing a darker, less sweet brownie. The exact cocoa-butter balance varies by bar.
- Brown sugar: adds moisture and molasses flavor but may soften the thin top. Replace only part of the granulated sugar if that trade-off appeals.
- Extra flour: makes a firmer, more cake-like crumb. Measure 85 g rather than packing a cup.
- More whole egg: adds both water and protein, increasing structure.
- Oil instead of butter: changes flavor and how the batter sets; it is not a direct promise of “more fudgy.” Use a formula designed for oil.
Common failures
| Problem | Cause | Next time |
|---|---|---|
| Cakey | Too much flour, overbaking, or extra leavener | Weigh flour; omit leavener; check at 27 minutes |
| Raw center | Pan too small, oven cool, or early removal | Use 8-inch pan and verify cues |
| Greasy layer | Chocolate mixture overheated or emulsion split | Melt gently; add eggs after brief cooling |
| No crackly top | Sugar poorly incorporated or substitution changed it | Use granulated sugar and whisk before flour |
| Dry edges | Dark pan or excessive bake | Use light metal; start earlier |
| Ragged slices | Cut while warm | Cool at least 90 minutes; wipe knife |
For a molten dessert designed to stay fluid in the middle, use the tested chocolate lava cake. A brownie should be fully baked even though its cooled texture remains dense.
Scaling and add-ins
Do not put a doubled batch in the same pan; depth changes the bake beyond a simple time extension. Double into two 8-inch pans, or use a separately tested larger-pan version.
Keep add-ins near 1/2 cup (85 g) so the batter remains dominant. Toast nuts and cool them before folding. Avoid wet fruit puree or a ribbon of thin caramel unless the recipe is rebalanced; extra water creates gummy pockets.
Storage
Cool completely before covering. Store plain brownies airtight at cool room temperature for 3 to 4 days. Refrigeration firms the cocoa butter and makes them seem harder; bring chilled pieces back toward room temperature before judging texture.
Freeze wrapped individual squares in an airtight container for up to 2 months for best quality. Thaw covered so condensation forms on the wrapping rather than the brownie. Desserts with cream cheese, custard, or other perishable toppings need refrigeration according to the topping's requirements.
The reliable result comes from weighed flour, moderate heat, and patience after baking. Pull when moist crumbs—not liquid batter—remain, then let the center finish setting before cutting. More measured formulas live in classic desserts.